
Cedar Sense Articles
How to Build a Sauna, Part 3: Sauna Ventilation Done Right


I recently talked with a man in Florida who was halfway through building his own sauna. He had the wood, the heater and the bench plans. What he didn’t have was a single vent. He had no idea a sauna needs one. That conversation is the reason this article exists. Ventilation is the part of a sauna build most people skip, and it’s the part that decides whether your sauna feels fresh and even or stuffy, headache-inducing and moldy. This is Part 3 of our 5-part sauna building guide.
The short version
- Every sauna needs fresh air coming in, stale air going out and a way to dry out after use.
- Intake: low, under or right beside the heater, so fresh air gets warmed as it comes in.
- Exhaust: on the opposite wall, about 12 to 18 inches above the floor, often under the lower bench. Make it about twice the size of the intake.
- Dry vent: 12 to 18 inches below the ceiling with a closable cover. Closed during your session, open afterward.
- Aim to replace the room’s air about 6 times an hour.
- Indoor saunas should vent to outside air so moisture leaves the house.
Why a sauna needs ventilation
- Fresh oxygen. Several people in a small, hot, sealed room use up oxygen and build up carbon dioxide. That’s the heavy, stuffy feeling and the headache some people get after a sauna.
- Even heat. Without airflow, the heat stacks up at the ceiling while your feet sit in cool air. Moving air mixes the room so you feel the heat from head to toe.
- Better steam. Löyly, the burst of steam when you throw water on the stones, feels softer and spreads better in a room with good airflow.
- A dry room. After every session, the wood holds moisture. A sauna that can’t dry out grows mildew and mold, especially indoors and in humid places like Florida.
Where each vent goes
This is the layout we teach in our free ventilation guide, and it matches what heater makers like Harvia call for in their installation manuals.
1. Fresh air intake: low, at the heater
Put the intake on the heater wall, under or right beside the heater, a few inches to about a foot above the floor. Cold fresh air comes in, hits the heater right away and rises with the heat instead of chilling your feet. Put a screen or grille on it. Keep it from blowing straight onto the heater’s temperature sensor, or the heater will think the room is colder than it is.
Some builders add a second, optional intake higher up the wall above the heater, to mix fresh air into the hot air rising off the stones. It’s a nice extra, not a must.
2. Exhaust: low, on the opposite wall
Put the exhaust on the wall across from the heater, about 12 to 18 inches above the floor. Under the lower bench is a common spot that hides it nicely. This pulls the warm air down past the people on the benches before it leaves, so the whole room heats evenly.
Make the exhaust about twice the size of the intake. A bigger exhaust keeps air moving steadily without making the room drafty. In larger saunas, the exhaust can use a fan.

3. Dry vent: high, with a cover you can close
Add a vent about 12 to 18 inches below the ceiling with a slide or hatch you can open and close. Keep it closed during your session so you don’t dump the hottest air. Open it, and crack the door, after you’re done so the hot, damp air escapes and the wood dries. In an indoor sauna, this vent should lead to outside air, not into your basement or bathroom.

How much air: about 6 changes an hour
Heater makers call for replacing the room’s air about 6 times an hour. Multiply your room volume by 6, then divide by 60 to get cubic feet per minute (CFM). A 6×8 room with a 7 ft ceiling is 336 cu ft, so it needs about 34 CFM. A well-placed intake and exhaust move that much on their own in most home saunas. If you add a fan, that’s the number to size it to. The planner in Part 1 works it out for your room.
Most bath fans are rated for normal room temperatures and fail fast at 190°F. Put the fan in the duct outside the hot room, or use one rated for sauna heat.
Wood-burning stoves breathe too
A wood stove pulls its combustion air from the room, so it already moves a lot of air. Keep the fresh air intake low and near the stove so the fire has plenty of air and the room doesn’t feel starved. Some stoves can take outside combustion air through a kit, which is even better. Always follow the stove’s manual for chimney height, clearances and heat shields.
Put a carbon monoxide alarm in the changing room or the room next to the sauna. Alarms aren’t made for the heat inside the hot room itself.

Gas heaters: follow the manual exactly
Propane and natural gas sauna heaters have their own intake and exhaust requirements set by the maker. Use their vent kit and their clearances. Don’t improvise.
The most common ventilation mistakes
- No vents at all. Our Florida builder isn’t alone. A door gap is not a ventilation system.
- Intake and exhaust on the same wall. The air short-circuits and never crosses the room.
- Exhaust at the ceiling. It dumps your hottest air and the heater can’t keep up. Keep the exhaust low and use the high vent only for drying.
- Exhaust smaller than the intake. Air stalls. Go about twice the intake size.
- Indoor sauna venting into the house. The moisture ends up in your basement. Vent to outside.
- Never opening the dry vent. The room stays damp between uses and starts to smell.
Vent covers and hatches
Wood vent grilles blend in with the paneling and stay cool to the touch. Here are the ones we carry:
 PROSAUNAS Sauna Air Vent Grille | Alder, Aspen or Thermo-AspenFrom $84.00
 PROSAUNAS Sauna Ventilation Hatch | Adjustable | Alder, Aspen or Thermo-AspenFrom $84.00
 PROSAUNAS Round Sauna Ventilation Cover | Thermo-Abachi or Black | Adjustable | Fits 4" Vent PipeFrom $139
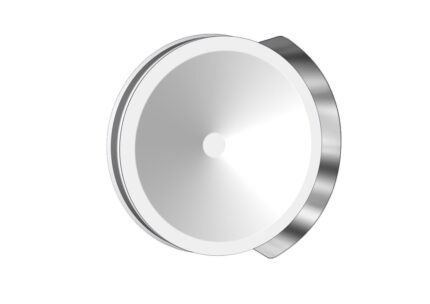 Harvia Supply Air Diffuser | Sauna Inlet Vent | SASPO105$41.00
From our shop: we put together a free one-page ventilation guide because we kept having the same conversation, most recently with that Florida builder. If you want the diagram to keep at your job site, download the free sauna ventilation guide. Planning a build and want a second set of eyes on your vent layout? Text a sketch to Mike at 218-760-2041.
Sauna ventilation questions
Does a sauna need ventilation?
Yes. A sauna needs a fresh air intake, an exhaust and a way to dry out after use. Without them the air gets stale, the heat sits at the ceiling and the wood stays damp, which leads to mold.
Where should the vents go in a sauna?
Put the fresh air intake low, under or beside the heater. Put the exhaust on the opposite wall about 12 to 18 inches above the floor, often under the lower bench. Add a closable dry vent 12 to 18 inches below the ceiling.
How big should sauna vents be?
Make the exhaust about twice the size of the intake. Plan for the room air to change about 6 times an hour: room volume times 6, divided by 60, gives the CFM.
Should the top sauna vent be open during a session?
No. Keep the high dry vent closed while you bathe so you keep the hottest air in. Open it and crack the door after the session so the sauna can dry.
Building a sauna? Talk to a real person.
Cedar Sense is a family sauna business in Waubun, Minnesota. We help builders and homeowners size heaters, plan vents and order every part of a build in one shipment. Call or text 218-760-2041. Building saunas for clients? See our contractor pricing.
