
Cedar Sense Articles
How to Build a Sauna, Part 5: Paneling, Benches, Door, Lights and Floor


This is the part everyone pictures when they think about building a sauna: the wood going up, the benches, the soft light. It’s also where small details decide how the sauna feels for the next 20 years, like whether the benches burn your legs, whether the boards stain black around the nails, and whether the floor stays dry. This is Part 5, the last in our 5-part sauna building guide.
The short version
- Use real sauna wood: cedar, aspen, alder, hemlock or thermally modified wood. Never treated, painted or sealed lumber inside the hot room.
- Panel the ceiling first, then the walls. Run horizontal boards tongue up.
- Blind-nail through the tongue with stainless steel nails so no metal shows and nothing bleeds.
- Build benches with gaps between the slats and screw them from underneath. No metal on top.
- Use sauna-rated lighting, mounted low, with drivers outside the hot room.
- Concrete or tile floors with a duckboard or interlocking tiles on top work best.
Choose the wood
Sauna wood has to handle 190°F heat and quick swings in humidity without warping, oozing sap or getting too hot to touch.
| Wood | Why builders pick it | Best for |
|---|---|---|
| Western red cedar | Classic sauna smell, naturally rot resistant, stable | Walls, ceilings, benches (clear grade for benches) |
| Aspen | No knots, no resin, low odor, stays cooler to the touch | Benches, backrests, walls for people sensitive to smells |
| Alder | Smooth, warm color, few knots | Walls, benches, trim |
| Thermo-aspen and thermo-spruce | Heat-treated, very stable, rich dark color | Modern looks, walls, accent ceilings |
| Hemlock | Clear, straight grain, affordable | Walls and benches |
Comparing two favorites? Read cedar vs thermowood for a sauna.

Install the paneling
- Let the wood acclimate. Stack the boards in the room for a couple of days before you start.
- Start with the ceiling. The wall boards then tuck up under the ceiling edge and help hold it.
- Fasten to the furring strips you put over the foil in Part 2. Never nail tight to the foil.
- Run horizontal boards tongue up, groove down, so water runs off the joint instead of sitting in it. Vertical boards also work and give a clean, modern look.
- Blind-nail through the tongue at an angle so the next board hides the nail. Use stainless steel nails or staples. Plain steel can rust and leave black streaks in cedar.
- Leave a small gap at the floor and in the corners so the wood can move with the heat and humidity, then cover the corners with trim.
- Cut the vent openings where you framed them in Part 3, and finish them with wood grilles.
Leave the inside bare. No stain, varnish, polyurethane or paint on the hot-room walls or ceiling. Finishes get sticky, give off fumes in the heat and trap moisture in the wood. If you want to protect the benches, use a paraffin oil made for saunas.
Build the benches
- Slats: 2×4 boards on edge or flat, with a 3/8 to 1/2 inch gap between them so water drains and air moves.
- No metal on top. Screw the slats on from underneath with stainless screws. A screw head on top gets hot enough to burn.
- Eased edges. Round over the front edges so they’re comfortable on the backs of your legs.
- Solid support. Fasten the frames into the blocking you added during framing. A full top bench holds a lot of weight.
- Removable sections make cleaning under the benches much easier.
- Backrests: angled slats or a ready-made backrest keep your back off the hot wall.
- Heights: set them from the ceiling down, as covered in Part 1, about 36 to 42 inches below the ceiling for the top bench.

Hang the door
A prehung sauna door is the simplest route. It comes with the frame, tempered glass, heat-rated hinges and a wood handle. Remember the rules from Part 1: it opens out, it has no lock, and a 24 x 73 in door holds heat better than a tall one. Tape the foil to the door frame before you trim it out.
Add lighting
- Use fixtures and LED strips rated for sauna heat. Regular fixtures and LED strips fail fast at 190°F.
- Mount lights low: behind the backrest, under the top bench or low on the wall. Bright light from the ceiling feels harsh.
- Keep drivers and transformers outside the hot room.
- Never put a light directly above the heater.
- Add a dimmer if you can. Low light is half the experience.
Finish the floor
- Best base: concrete or tile, ideally sloped toward a floor drain.
- Skip carpet, vinyl and laminate inside the hot room.
- Add comfort on top: a wood duckboard or interlocking sauna floor tiles keep your feet off the hot, wet floor and lift out for cleaning.
- Wood stoves need the non-combustible base the manual calls for, no matter what the rest of the floor is.

Final checklist before your first sauna
- Heater installed to the manual’s clearances, with a guard rail, inspected and powered by a licensed electrician
- Temperature sensor in the spot the manual shows
- Intake, exhaust and dry vent in place and open
- Foil continuous and taped, with no gaps around the door or vents
- Benches solid, with no metal on top
- Door opens out freely with no lock
- Sauna stones loaded loosely
- First burn-in done: about an hour at full heat with the door cracked
- Thermometer mounted at head height, away from the heater
- Bucket and ladle ready
After every session
Open the dry vent, crack the door and let the room dry out completely. Wipe down the benches now and then, and keep towels on them so sweat stays off the wood. For longer-term care, read our tips for keeping a cedar sauna looking new.
Finish materials builders order from us
 Western Red Cedar 1x4 Tongue and Groove Sauna Wood | Select Tight Knot | V-Joint | 8 or 10 ftFrom $3.11
 Aspen 1x4 Tongue and Groove Sauna Wood | STS4 Nickel Gap | 2 to 10 ftFrom $5.19
 Thermo-Aspen 1x4 Tongue and Groove Sauna Wood | STS4 Nickel Gap | 2 to 10 ftFrom $5.15
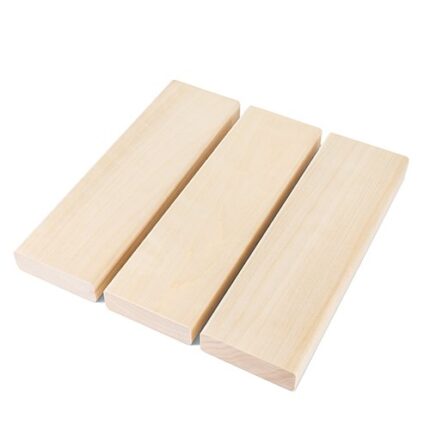 Aspen 2x4 Sauna Bench Wood | Smooth 4 Sides Eased Edges | 2 to 10 ftFrom $7.86
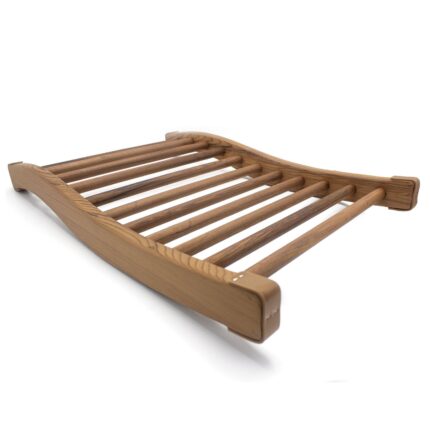 PROSAUNAS S-Shaped Sauna Backrest | Pine or CedarFrom $69.00
 PROSAUNAS 2-Zone Dimmable Sauna LED Light Kit | Wi-Fi and Remote | 2 x 10 ft, 2 x 16 ft or 4 x 10 ftFrom $625
 Prehung Glass Sauna Door 24" x 73" | Black Alder, Aspen or Thermo-Aspen | Clear or Tinted$893
 Tru-Tile Sauna Flooring | Interlocking PVC Tiles for Sauna Floors | 12" x12" x 9/16"$12.40
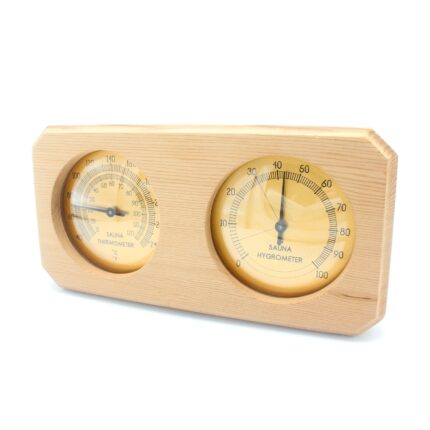 PROSAUNAS Sauna Thermometer and Hygrometer | Pine or Cedar FrameFrom $49.00
From our shop: the finish work is where builders save the most by ordering everything at once. Our sauna packages include the wall and ceiling wood, bench wood, the heater and stones, a prehung glass door, a window, flooring, lighting, vapor barrier and vents, counted for your room size and shipped in one order. Build saunas for clients? Our contractor program takes 5% to 9% off every order, and you can list your business free in our Find a Sauna Builder directory.
Sauna finishing questions
What wood should I use for sauna benches?
Aspen, clear cedar, alder, hemlock and thermally modified woods all work. Aspen is a favorite because it has no knots or resin and stays cooler to the touch. Never use pressure-treated or painted wood inside a sauna.
Which way does tongue and groove go in a sauna?
For horizontal boards, put the tongue up and the groove down so water runs off the joint. Start with the ceiling, blind-nail through the tongue with stainless nails, and attach the boards to furring strips over the foil.
Should I seal or stain the inside of my sauna?
No. Leave the walls and ceiling bare. Finishes get sticky and give off fumes in the heat. If you want to protect the benches, use a paraffin oil made for saunas.
What kind of lights can go in a sauna?
Only fixtures and LED strips rated for sauna heat. Mount them low, behind backrests or under benches, keep drivers outside the hot room and never put a light right above the heater.
Building a sauna? Talk to a real person.
Cedar Sense is a family sauna business in Waubun, Minnesota. We help builders and homeowners size heaters, plan vents and order every part of a build in one shipment. Call or text 218-760-2041. Building saunas for clients? See our contractor pricing.
